Creating a Podman Desktop extension
This tutorial covers the following end-to-end tasks required to create and run a Podman Desktop extension:
- Initializing an extension
- Writing the extension entry point
- Build dependencies
- Running the extension
- Verifying the extension's features
You can write an extension in TypeScript or JavaScript. You can simplify extension creation by specifying two entry points: activate() and deactivate() from within the extension.
All Podman Desktop functionalities are communicated entirely through the API. The extension you create interacts with the Podman Desktop API through the @podman-desktop/api package. The type definition of the @podman-desktop/api API is hosted as part of the npm package.
Before you begin
Make sure you have:
- Installed Podman Desktop.
- A running Podman machine.
- A developer role.
- Installed
JavaScriptorTypeScript. - A clone of the Podman Desktop repository on your local machine.
Initializing an extension
Create a package.json file to initialize your extension.
-
Create a subdirectory, such as
foobarin theextensionsdirectory of the Podman Desktop repository. -
Initialize a
package.jsonfile and add it to the subdirectory.{} -
Add
TypeScriptand the Podman Desktop API to the development dependencies:"devDependencies": {"@podman-desktop/api": "latest","typescript": "latest","vite": "latest"}, -
Add the required metadata:
"name": "my-extension","displayName": "My Hello World extension","description": "How to write my first extension","version": "0.0.1","icon": "icon.png","publisher": "benoitf", -
Add the Podman Desktop version to run the extension:
"engines": {"podman-desktop": "latest"}, -
Add the main entry point:
"main": "./dist/extension.js" -
Add a
Hello Worldcommand contribution:"contributes": {"commands": [{"command": "my.first.command","title": "My First Extension: Hello World"}]} -
Validate the complete
package.jsonfile manually:Example: The complete
package.jsonfile{"devDependencies": {"@podman-desktop/api": "latest","typescript": "latest","vite": "latest"},"name": "my-extension","displayName": "My Hello World extension","description": "How to write my first extension","version": "0.0.1","icon": "icon.png","publisher": "benoitf","engines": {"podman-desktop": "latest"},"scripts": {"build": "vite build","test": "vitest run --coverage","test:watch": "vitest watch --coverage","watch": "vite build --watch"},"main": "./dist/extension.js","contributes": {"commands": [{"command": "my.first.command","title": "My First Extension: Hello World"}]}} -
Add an
icon.pngfile to the subdirectory.
Writing the extension entry point
-
Create a
src/extension.tsfile in the subdirectory. -
Import the Podman Desktop API into the file:
import * as podmanDesktopAPI from '@podman-desktop/api'; -
Use one of the following ways to expose the
activatefunction:-
Synchronous (sequential execution of tasks)
export function activate(): void; -
Asynchronous (parallel execution of tasks)
export async function activate(): Promise<void>;
-
-
Optional: Add an extension context to the
activatefunction by enabling the extension to register disposable resources:export async function activate(extensionContext: podmanDesktopAPI.ExtensionContext): Promise<void> {} -
Add the features of the extension to the file. This sample extension:
- Registers the command referenced in the
package.jsonfile. - Displays an option for the user to select values from the dropdown list.
- Displays a pop-up message with the values selected by the user.
- Creates an item in the status bar to run the command.
import * as podmanDesktopAPI from '@podman-desktop/api';export async function activate(extensionContext: podmanDesktopAPI.ExtensionContext): Promise<void> {// register the command referenced in package.json fileconst myFirstCommand = podmanDesktopAPI.commands.registerCommand('my.first.command', async () => {// display a choice to the user for selecting some valuesconst result = await podmanDesktopAPI.window.showQuickPick(['un', 'deux', 'trois'], {canPickMany: true, // user can select more than one choice});// display an information message with the user choiceawait podmanDesktopAPI.window.showInformationMessage(`The choice was: ${result}`);});// create an item in the status bar to run our command// it will stick on the left of the status barconst item = podmanDesktopAPI.window.createStatusBarItem(podmanDesktopAPI.StatusBarAlignLeft, 100);item.text = 'My first command';item.command = 'my.first.command';item.show();// register disposable resources to it's removed when you deactivte the extensionextensionContext.subscriptions.push(myFirstCommand);extensionContext.subscriptions.push(item);} - Registers the command referenced in the
-
Optional: Use one of the following ways to expose the
deactivatefunction:-
Synchronous
export function deactivate(): void; -
Asynchronous
export async function deactivate(): Promise<void>;noteThe above example is not a full representation of every functionality an extension can be used for. You can expand the internal Podman Desktop functionalities, such as creating a new provider and adding new commands. See our API documentation for more information.
-
Build dependencies
You can build this extension by configuring TypeScript and Vite.
- Create a file named
tsconfig.jsonwith the following content in the subdirectory:
{
  "compilerOptions": {
    "module": "esnext",
    "lib": ["ES2017"],
    "sourceMap": true,
    "rootDir": "src",
    "outDir": "dist",
    "target": "esnext",
    "moduleResolution": "Node",
    "allowSyntheticDefaultImports": true,
    "resolveJsonModule": true,
    "skipLibCheck": true,
    "types": ["node"]
  },
  "include": ["src", "types/*.d.ts"]
}
- Create a file named
vite.config.jswith the following content in the subdirectory:
/**********************************************************************
 * Copyright (C) 2023 Red Hat, Inc.
 *
 * Licensed under the Apache License, Version 2.0 (the "License");
 * you may not use this file except in compliance with the License.
 * You may obtain a copy of the License at
 *
 * http://www.apache.org/licenses/LICENSE-2.0
 *
 * Unless required by applicable law or agreed to in writing, software
 * distributed under the License is distributed on an "AS IS" BASIS,
 * WITHOUT WARRANTIES OR CONDITIONS OF ANY KIND, either express or implied.
 * See the License for the specific language governing permissions and
 * limitations under the License.
 *
 * SPDX-License-Identifier: Apache-2.0
 ***********************************************************************/

import { join } from 'path';
import { builtinModules } from 'module';

const PACKAGE_ROOT = __dirname;

/**
 * @type {import('vite').UserConfig}
 * @see https://vitejs.dev/config/
 */
const config = {
  mode: process.env.MODE,
  root: PACKAGE_ROOT,
  envDir: process.cwd(),
  resolve: {
    alias: {
      '/@/': join(PACKAGE_ROOT, 'src') + '/',
    },
  },
  build: {
    sourcemap: 'inline',
    target: 'esnext',
    outDir: 'dist',
    assetsDir: '.',
    minify: process.env.MODE === 'production' ? 'esbuild' : false,
    lib: {
      entry: 'src/extension.ts',
      formats: ['cjs'],
    },
    rollupOptions: {
      external: ['@podman-desktop/api', ...builtinModules.flatMap(p => [p, `node:${p}`])],
      output: {
        entryFileNames: '[name].js',
      },
    },
    emptyOutDir: true,
    reportCompressedSize: false,
  },
};

export default config;
Running the extension
-
Stop the Podman Desktop application if it runs in the background.
-
Run the following command from your clone of the Podman Desktop repository:
pnpm watch --extension-folder <path-to-your-extension>The extension compiles and generates the output in the
distfolder of the subdirectory.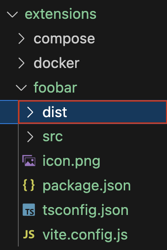 note
noteYou can also run and verify the extension directly from the Podman Desktop UI.
Verifying the extension's features
-
Click Extensions in the left navigation pane.
-
Search the created
My Hello Worldextension in the list. The extension isACTIVE.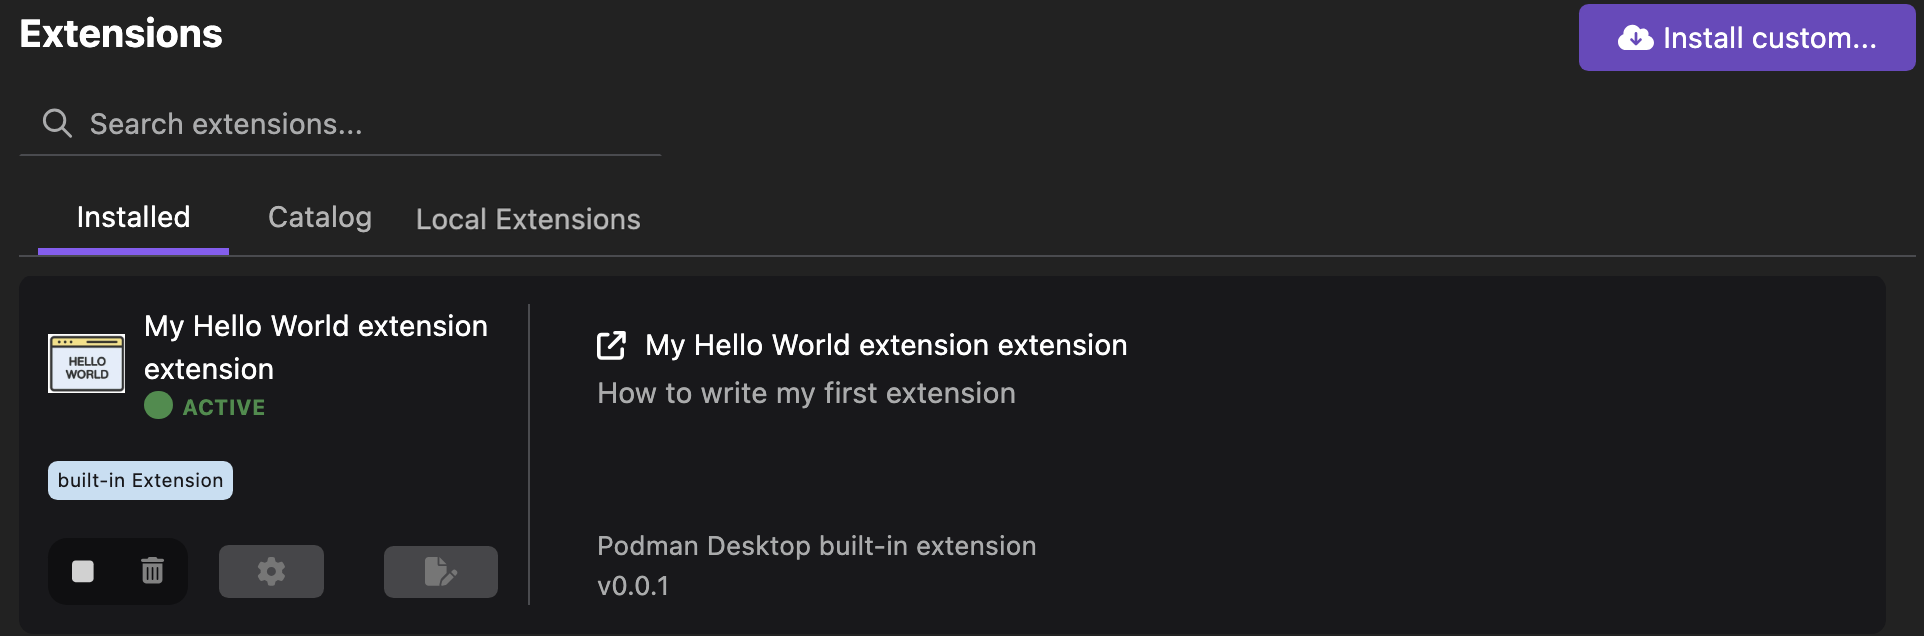
-
Verify the features of the extension:
-
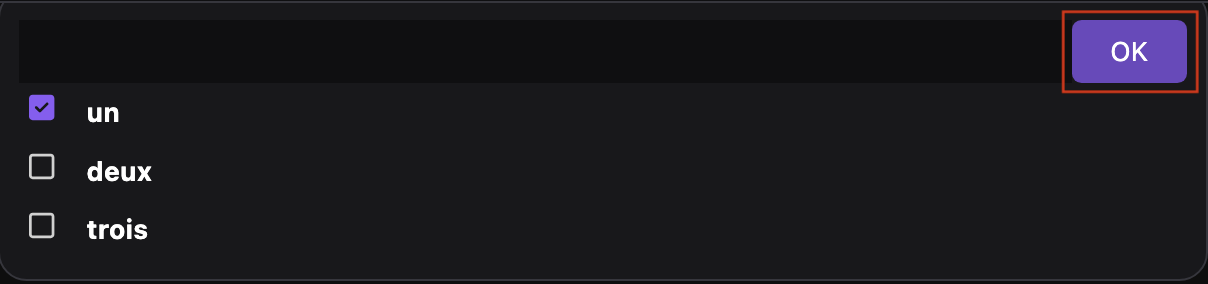
Click the
My first commanditem in the status bar. A dropdown list opens. -
Select a value from the dropdown list.
-
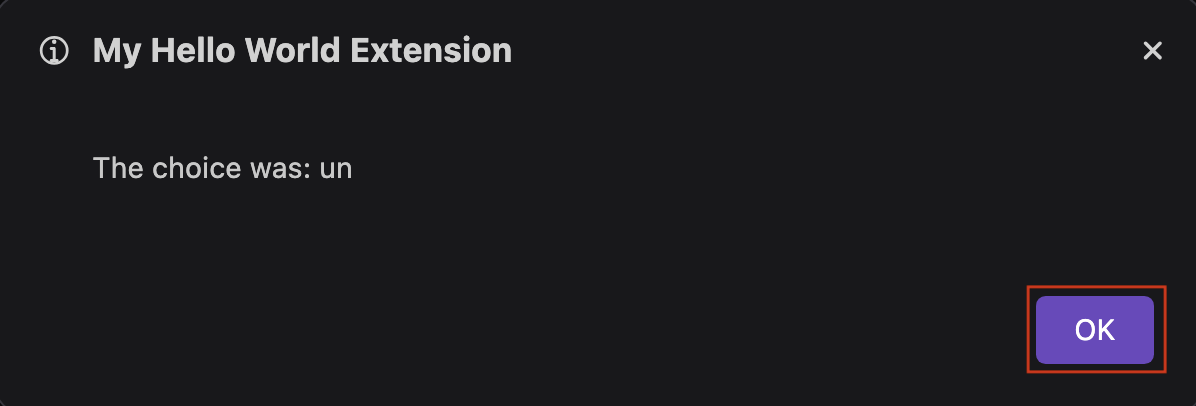
Click OK. A pop-up notifying the selected value opens.
-
Click OK.
 note
noteIf you have created a webview extension, you can access the console of the extension:
- Right-click the extension icon in the left navigation pane.
- Select Open Devtools of the webview.