Setting up container registries
Before you start, you should:
- Get authentication details for your container registry:
- Registry URL.
- User name.
- Password, or OAuth secret.
- Get the fully qualified name of a private image stored in your registry, such as
my-registry.tld/my-repository/my-image. - Get the fully qualified image name that your registry requires to push an image, such as
my-registry.tld/my-repository/my-image.
Setting up a pre-configured registry
To ease usage of the most popular container registries, Podman Desktop has pre-configured registries, including:
- Docker Hub
- Red Hat Quay
- GitHub
- Google Container Registry
If your container registry is in this list, follow the steps:
-
Go to Settings > Registries.
-
In your registry line, click Configure.
-
Enter your registry credentials:
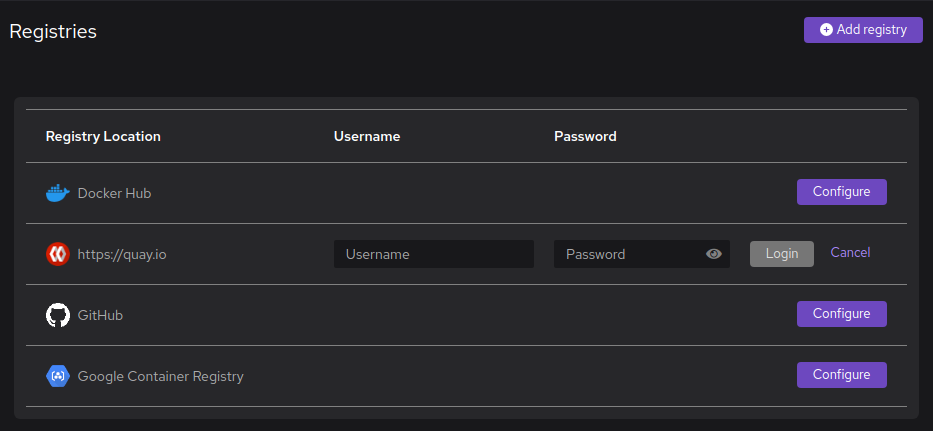
- Username: Enter your user name.
- Password: Enter your password or OAuth secret.
- Click Login.
Podman Desktop logs Podman in with the provided credentials.
If you enter the wrong credentials, you see an error message:
- Enter the correct credentials
- Click Login again.
Setting up a custom registry
You have a custom container registry, or one that is not available in the pre-configured list: we have got you covered. Follow the steps:
-
Go to Settings > Registries.
-
Click Add registry at the top right corner of the screen.
-
Enter your registry details:
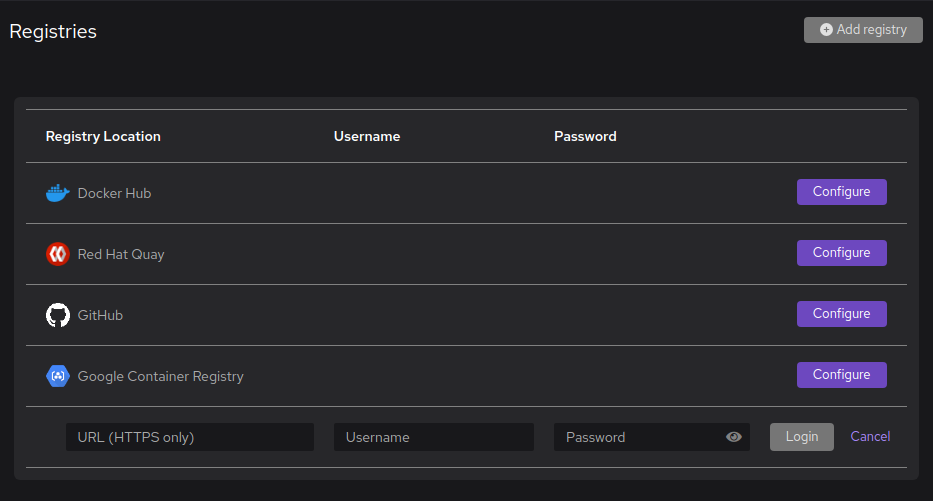
- Registry Location: Enter your repository URL, such as
https://myregistry.tld. - Username: Enter your user name.
- Password: Enter your password or OAuth secret.
- Click Login.
- Registry Location: Enter your repository URL, such as
Podman Desktop logs Podman in with the provided credentials.
If you enter the wrong credentials, you see an error message:
- Enter the correct credentials
- Click Login again.
Setting up a registry with an insecure certificate
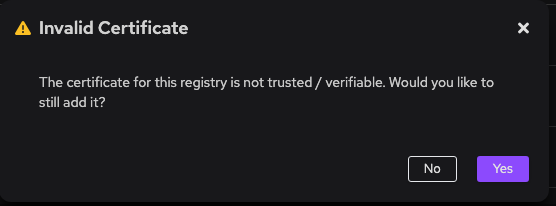
If your registry has an insecure certificate, such as a self-signed certificate, you see a warning when setting up the registry.
-
In the Invalid Certificate window, click Yes to add the registry anyway.
-
Tell Podman that it has your authorization to access the insecure registry: edit the
registries.conffile.-
Go to a location where you can edit the
registries.conffile:- Windows
- macOS
- Linux
- The configuration file is in the Podman machine: open a terminal in the Podman Machine.
$ podman machine ssh --username root [optional-machine-name]- The configuration file is in the Podman machine: open a terminal in the Podman Machine.
$ podman machine ssh --username root [optional-machine-name]- The configuration file is in your host: open a terminal with superuser privileges.
$ sudo su - -
Edit the registry optional configuration file.
# vi /etc/containers/registries.confFor each insecure registry, add a
[[registry]]section that defines:location =: Enter your registry URL.insecure = true: Accept the insecure certificate.
For example, if your have two registries, such as
https://my-registry.tldandhttp://registry.example.com, add the following lines:[[registry]]location = "my-registry.tld"insecure = true[[registry]]location = "registry.example.com"insecure = true
-
-
Restart Podman to apply the changes.
- Windows
- macOS
- Linux (rootless)
- Linux (rootful)
- Go to Settings > Resources.
- Restart the Podman machine.
- Go to Settings > Resources.
- Restart the Podman machine.
- Stop all Podman processes.
$ pkill podman- Restart Podman.
$ sudo systemctl restart podman
Verifying your registry setup
To verify your registry has been properly configured, you can do the following steps:
-
In Settings > Registries, the line with your registry has content in the Username and Password column, and action icons replacing the Configure button.
-
Pull a private image from the registry.
- Get the name of a private image stored in your registry, such as
quay.io/my-repository/my-image,ghcr.io/my-repository/my-image,docker.io/my-repository/my-image, ormy-registry.tld/my-repository/my-image. - Go to Images.
- Click Pull an image.
- On the Image to Pull screen:
- Image to pull: Enter the image name.
- Click Pull image.
- Click Done.
- Get the name of a private image stored in your registry, such as
-
Push an image to the registry:
-
Get the fully qualified image name that your registry requires, such as
quay.io/my-repository/my-image,ghcr.io/my-repository/my-image, ordocker.io/my-repository/my-image. -
Go to Images.
-
Click Build an image.
-
On the Build Image from Containerfile screen
- Containerfile path: select the Containerfile or Dockerfile to build.
- Image Name: enter the fully qualified image name that your registry requires.
- Click Build.
- Click Done.
-
On your image line, click .
The contextual menu has a Push Image to your registry entry.
-
Changing your credentials
To change your registry credentials, you can do the following steps:
- Go to Settings > Registries.
- On your registry line, click .
- Click Edit password.
- Enter your credentials in the Username and Password fields, and click Login.
Podman Desktop logs Podman in with the updated credentials.
Removing a registry
To remove your registry, you can do the following steps:
- Go to Settings > Registries.
- On your registry line, click .
- Click Remove.
Podman Desktop removes the registry from the settings, and logs Podman out from the registry.
Finding Podman registry configuration files
Podman has two files to configure registries:
-
auth.jsondefines the authentication to registries.Podman Desktop stores this file directly on your host, in
$HOME/.config/containers/auth.json.The Podman machine mounts the authentication configuration file to access it.
When you delete the Podman machine, the registry configuration is not lost: it stays on your host.
-
registries.confdefines optional features, such as allowing insecure certificates.The Podman machine stores the file in
/etc/containers/registries.conf.When you delete the Podman machine, this file is deleted.
Next steps
Consider completing some other common tasks that depend registries:
- Pulling an image.
- Pushing an image to a registry.