Onboarding
A Podman Desktop extension can offer an onboarding workflow to guide users in installing and setting up all the necessary tools for the extension to work, and optionally to provide explanations about the capabilities of the extension.
Adding onboarding to an extension is as simple as writing JSON in the package.json. Podman Desktop will convert the JSON object into actual code to render all items.
Onboarding consists of a title, a description, media (image), an enablement clause, and a list of steps. Only the title, enablement clause, and the steps are mandatory, as they constitute the minimum information required to define a workflow. Before getting into the details, let's examine the JSON schema.
{
  "title": "onboarding",
  "type": "object",
  "properties": {
    "title": {
      "type": "string"
    },
    "description": {
      "type": "string"
    },
    "media": {
      "path": {
        "type": "string"
      },
      "altText": {
        "type": "string"
      }
    },
    "enablement": {
      "type": "string"
    },
    "steps": {
      "type": "array",
      "items": {
        "type": "object",
        "properties": {
          "id": {
            "type": "string"
          },
          "title": {
            "type": "string"
          },
          "description": {
            "type": "string"
          },
          "media": {
            "path": {
              "type": "string"
            },
            "altText": {
              "type": "string"
            }
          },
          "command": {
            "type": "string"
          },
          "completionEvents": {
            "type": "array",
            "items": {
              "type": "string"
            }
          },
          "content": {
            "type": "array",
            "items": {
              "type": "array",
              "items": {
                "type": "object",
                "properties": {
                  "value": {
                    "type": "string"
                  },
                  "highlight": {
                    "type": "boolean"
                  },
                  "when": {
                    "type": "string"
                  }
                },
                "required": ["value"]
              }
            }
          },
          "when": {
            "type": "string"
          },
          "component": {
            "type": "string",
            "enum": ["createContainerProviderConnection", "createKubernetesProviderConnection"]
          },
          "state": {
            "type": "string",
            "enum": ["completed", "failed"]
          }
        },
        "required": ["id", "title"]
      }
    }
  },
  "required": ["title", "enablement", "steps"]
}
Title, Description and Media
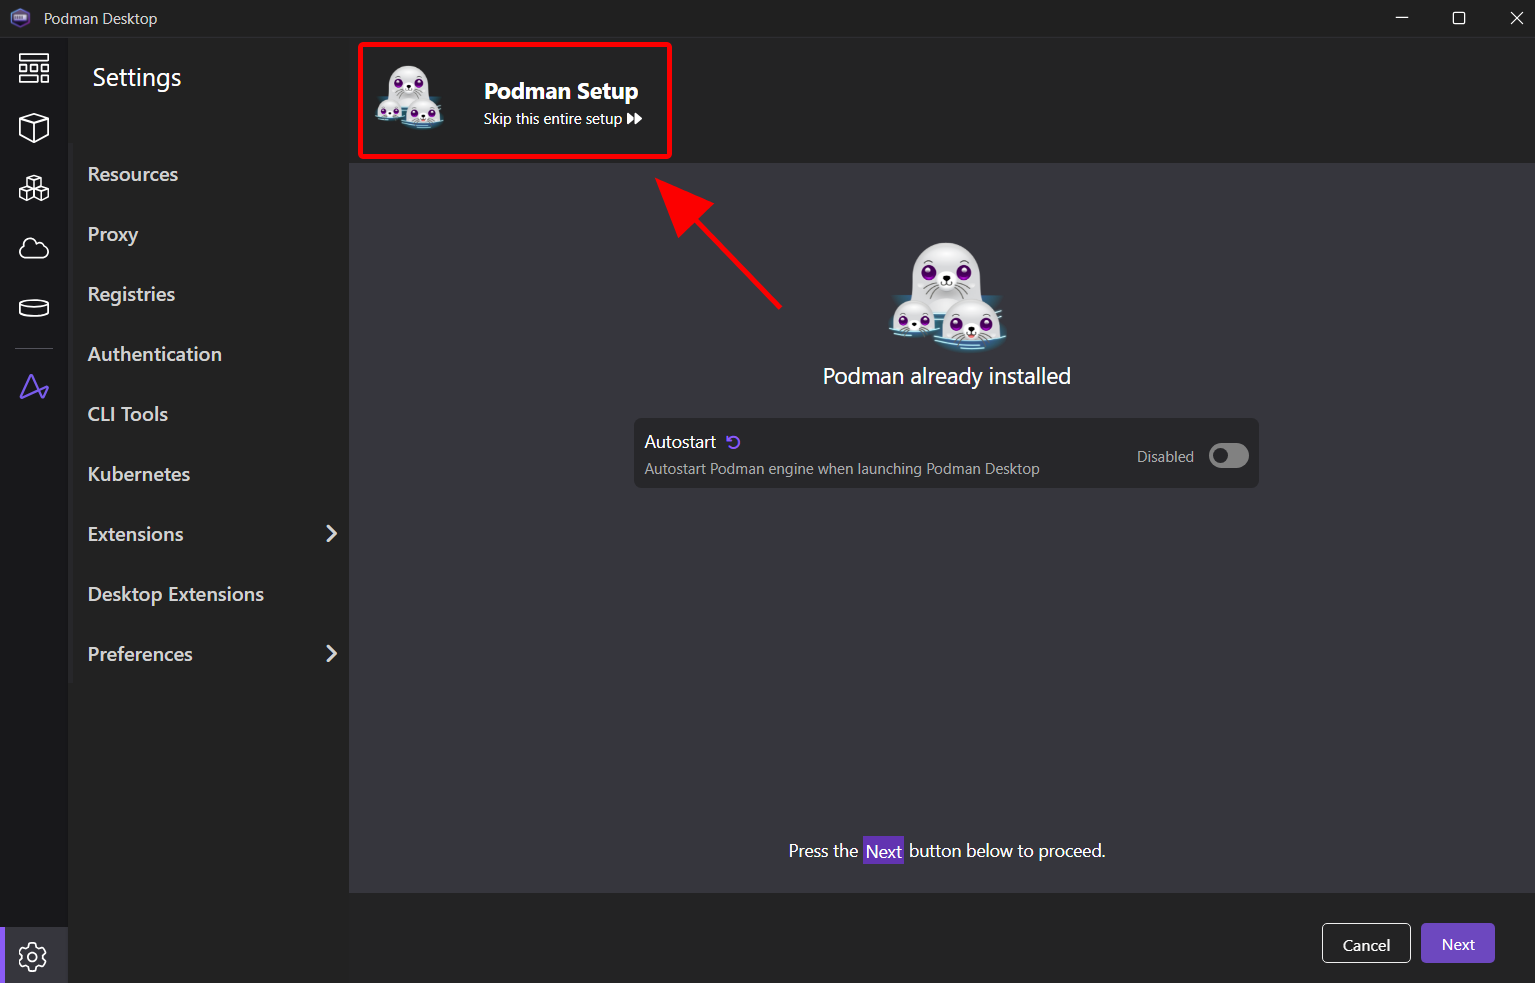
The title, the description and the media are all placed in the top left of the onboarding page.
Only the title is required. The description and the media are optional.
If the media is not specified, Podman Desktop will display the default icon set by the extension in its package.json.
This is how this JSON is defined:
"icon": "icon.png",
...
"onboarding": {
    "title": "Podman Setup",
}
Enablement
The enablement clause allows Podman Desktop to determine when the onboarding should be enabled. When this condition is met, the user will find a setup button within the resources page. Clicking on it will initiate the onboarding workflow.
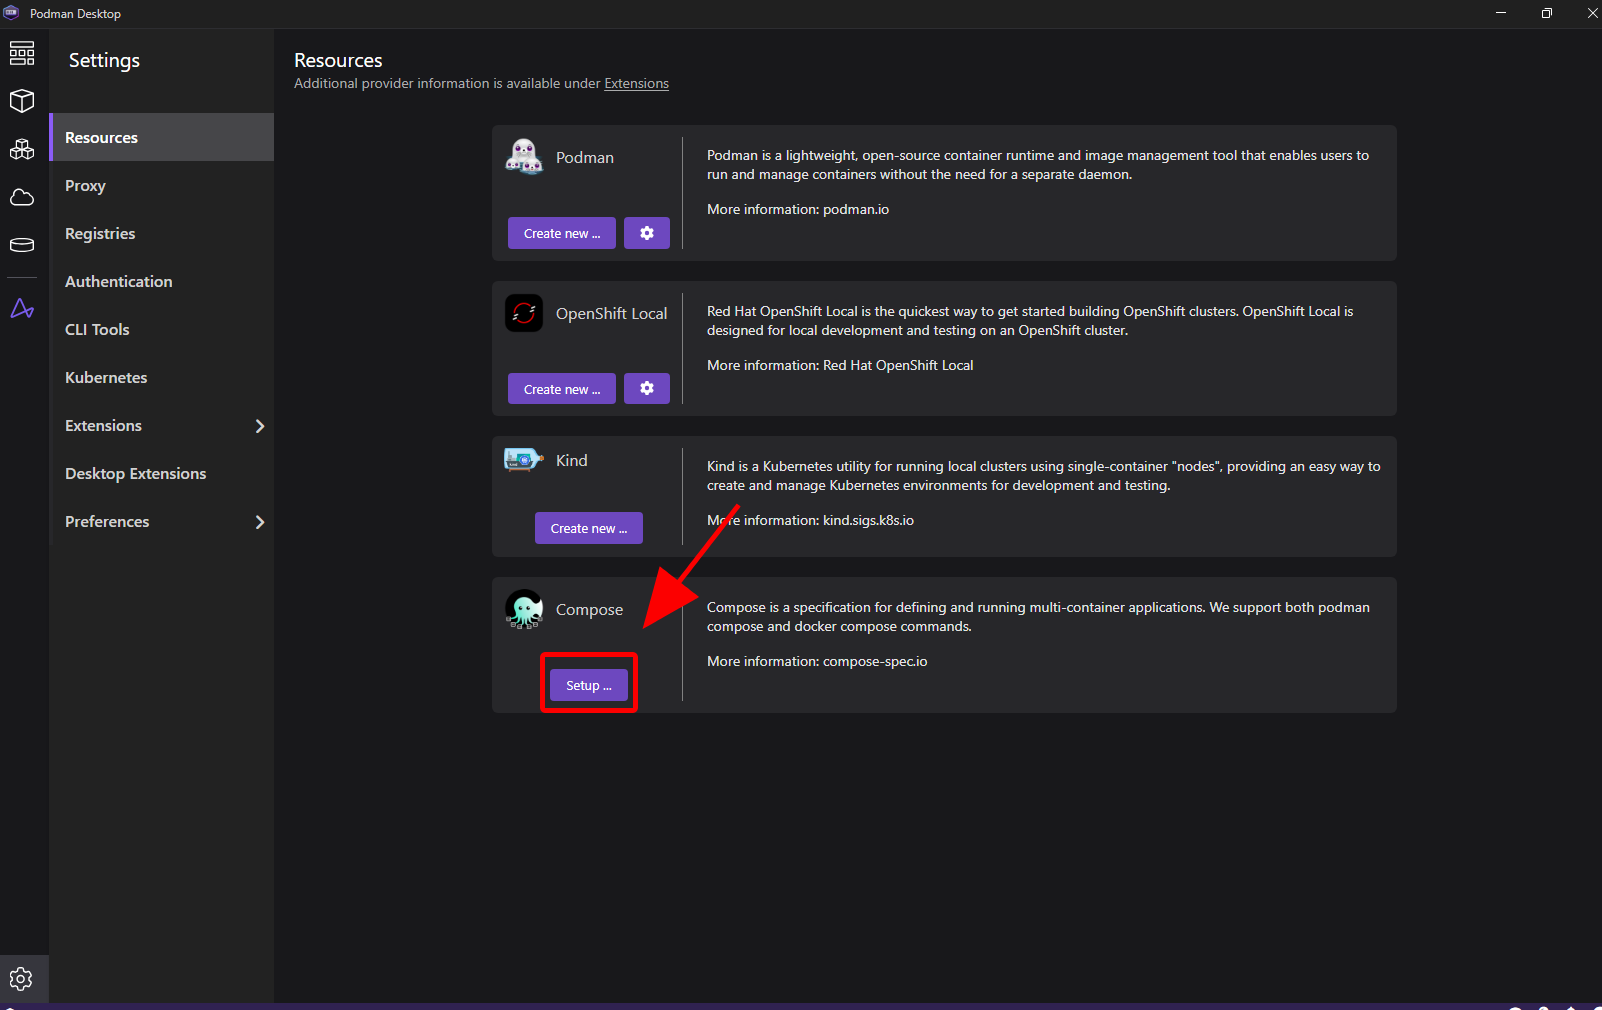
The enablement clause is mandatory and must be written by using when clauses.
In the following example, we specify that the onboarding needs to be enabled if and only if the user's OS is Linux, and the podmanIsNotInstalled context value is true. Alternatively, if the user's OS is different from Linux, that the podmanMachineExists context value must be false. Essentially, if the user is on Linux, the onboarding must be enabled only if podman is not installed; for all other operating systems, it should be enabled if there is no Podman machine.
"enablement": "(isLinux && onboardingContext:podmanIsNotInstalled) || (!isLinux && !onboardingContext:podmanMachineExists)"
Steps
The steps property is required and includes the actual content that will be displayed to the user during the workflow.
Each step can contribute to the onboarding process in various ways. You can choose to display content explaining concepts to the user, incorporate input elements (such as buttons or textboxes) to encourage user interaction, run commands to perform installations, or showcase settings to be configured.
Let's look again at its schema:
"type": "object",
"properties": {
    "id": {
        "type": "string"
    },
    "title": {
        "type": "string"
    },
    "description": {
        "type": "string"
    },
    "media": {
        "path": {
            "type": "string"
        },
        "altText": {
            "type": "string"
        },
    },
    "command": {
        "type": "string"
    },
    "completionEvents": {
        "type": "array",
        "items": {
            "type": "string"
        }
    },
    "content": {
        "type": "array",
        "items": {
            "type": "array",
            "items": {
                "type": "object",
                "properties": {
                    "value": {
                        "type": "string"
                    },
                    "highlight": {
                        "type": "boolean"
                    },
                    "when": {
                        "type": "string"
                    }
                },
                "required": ["value"]
            }
        }
    },
    "when": {
        "type": "string"
    },
    "component": {
        "type": "string",
        "enum": ["createContainerProviderConnection", "createKubernetesProviderConnection"]
    },
    "state": {
        "type": "string",
        "enum": ["completed", "failed"]
    }
},
"required": ["id", "title"]
A step has only two mandatory fields - id and title. All other properties are optional.
Id
The id must be unique to identify a step, and it is never displayed directly to the user.
To analyze more easily in telemetry the steps executed by users, the id values must respect some rules. To help developers respect these rules, a warning is displayed in case of non-repsect when Podman Destop loads the onboarding.
The rules are:
- for a step defining a command, the id must terminate with
Command, - for a state defining
state='failed', the id must terminate withFailure, - for a state defining
state='completed', the id must terminate withSuccess, - for any other step, the id must termminate with
View.
Title, description and media
The title, description and media works as explained earlier. The only difference is their placement - they will appear in the top-center of the body.
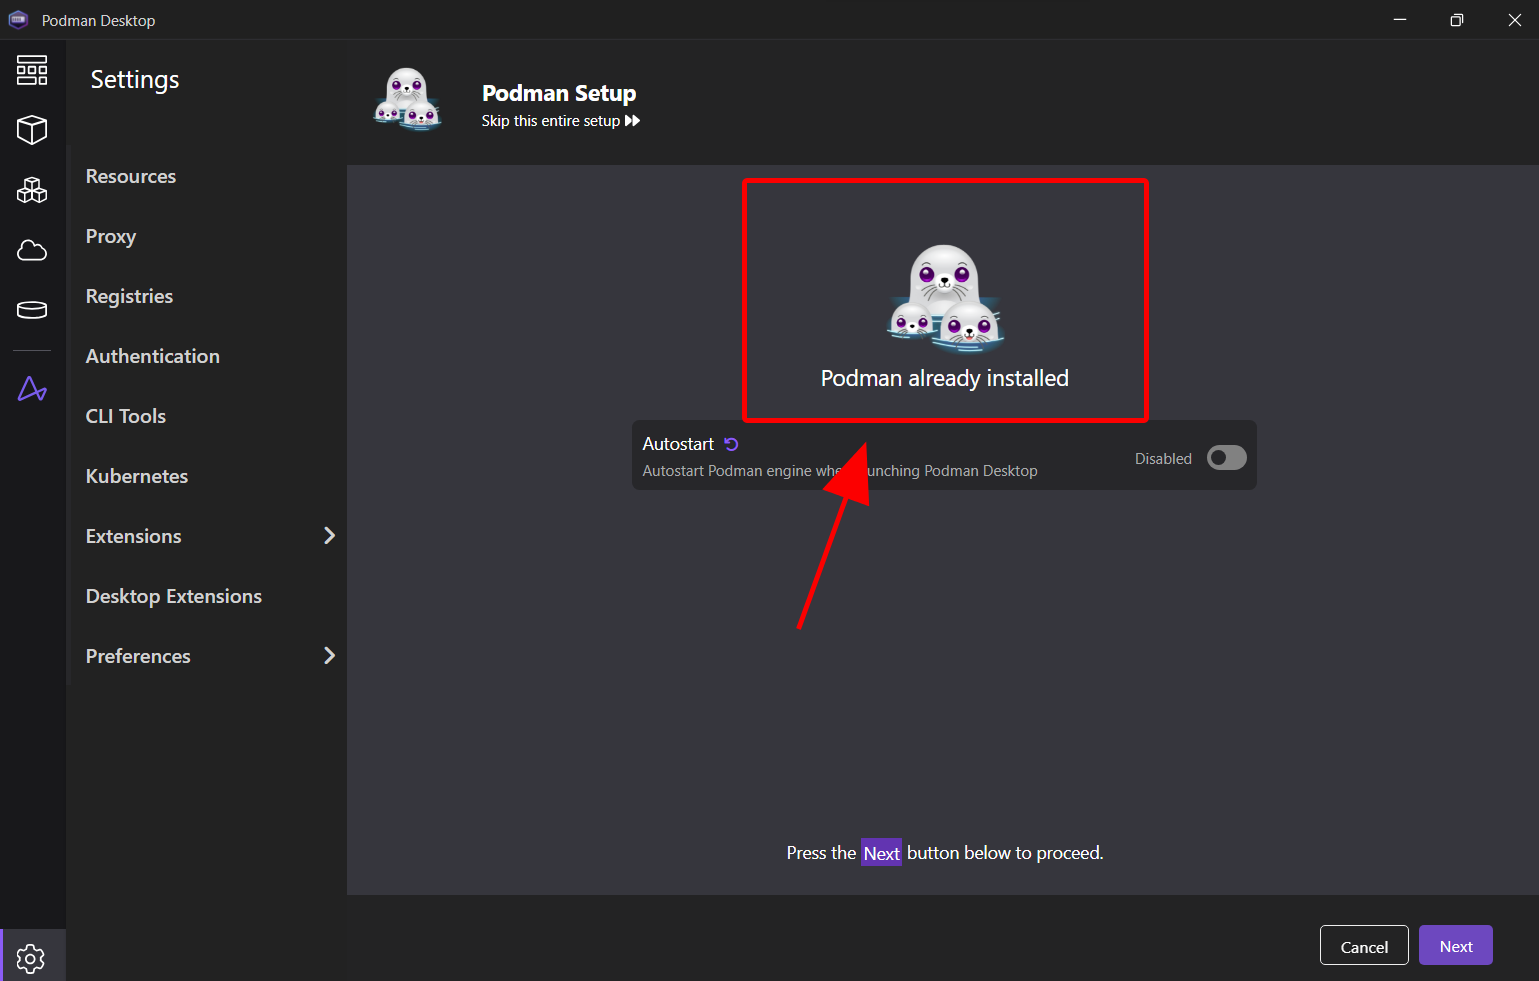
Note: If media is not specified, Podman Desktop will display the icon of the extension providing the onboarding.
Command
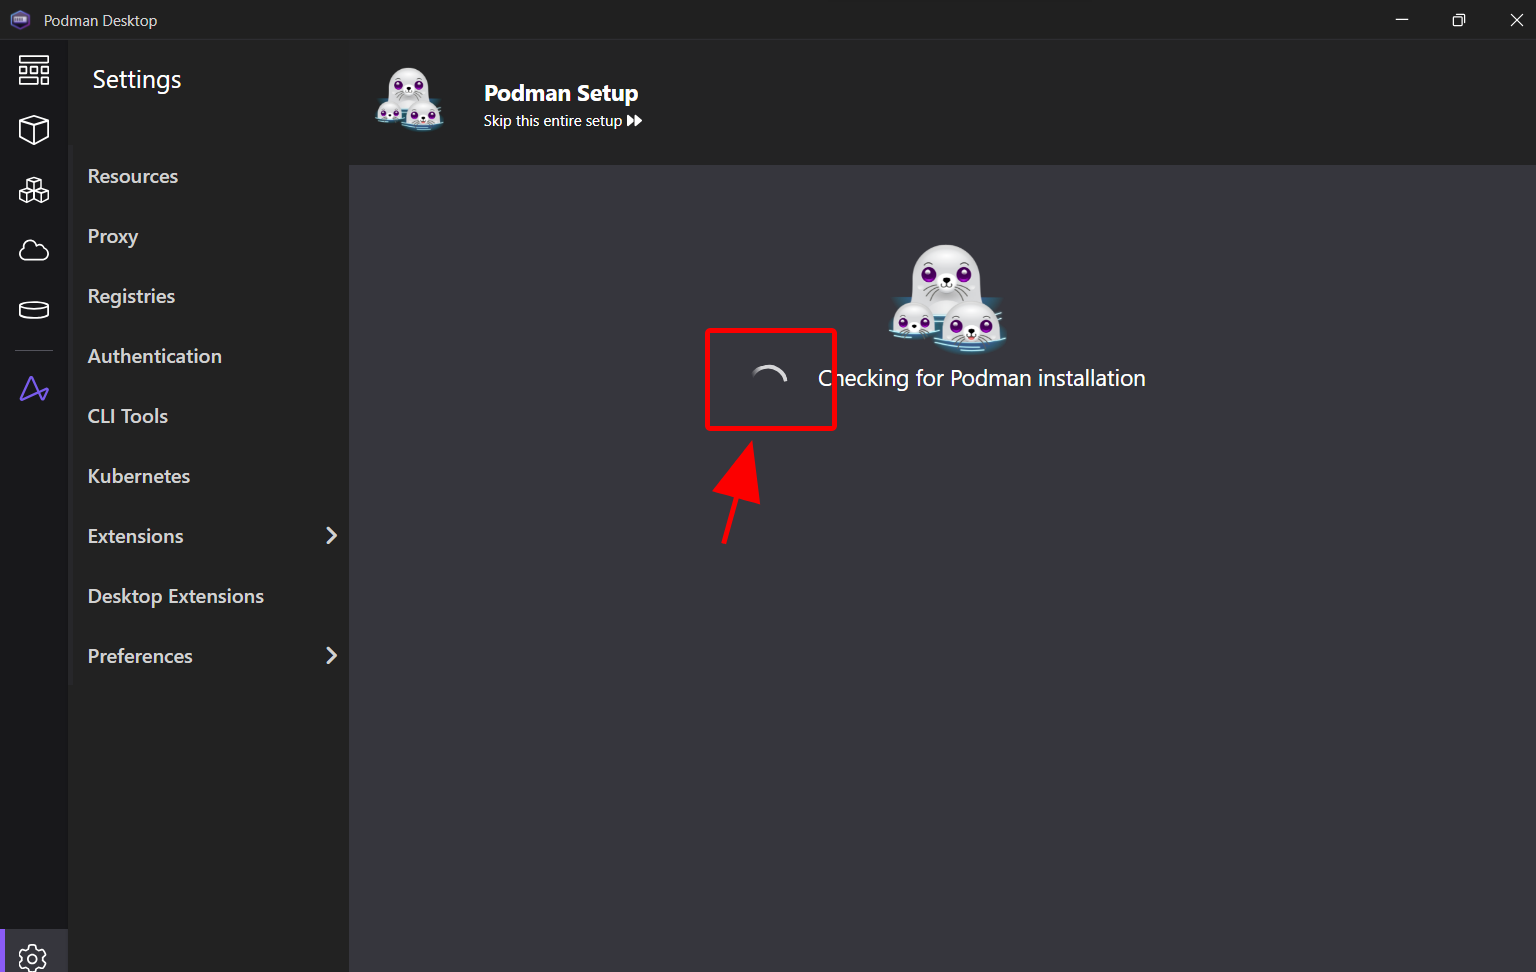
The command field allows you to declare the name of a command that must be run when the step becomes active. The command must be registered by the extension beforehand, or it will result in an error.
In the example below, we tell Podman Desktop to call podman.onboarding.checkPodmanInstalled when the checkPodmanInstalled step becomes active.
Based on the result, we can then prompt the user to move to another step or display a message.
"commands": [
    {
    "command": "podman.onboarding.checkPodmanInstalled",
    "title": "Podman: Check podman installation"
    },
],
"onboarding": {
    "title": "Podman Setup",
    "steps": [
    {
        "id": "checkPodmanInstalled",
        "title": "Checking for Podman installation",
        "command": "podman.onboarding.checkPodmanInstalled",
    },
    ...
    ],
    ...
}
During the execution of the command, the user will see a spinner next to the title.
CompletionEvents
CompletionEvents define the conditions under which a step should be considered complete.
It currently supports onboardingContext and onCommand events.
The former can be used to evaluate a context value, such as onboardingContext:podmanIsInstalled. The latter checks if the command has been executed - onCommand:podman.onboarding.installPodman.
A practical example of progressing the user to the next step after the command finishes its execution is:
"commands": [
    {
    "command": "podman.onboarding.checkPodmanInstalled",
    "title": "Podman: Check podman installation"
    },
],
"onboarding": {
    "title": "Podman Setup",
    "steps": [
    {
        "id": "checkPodmanInstalled",
        "title": "Checking for Podman installation",
        "command": "podman.onboarding.checkPodmanInstalled",
        "completionEvents": [
            "onCommand:podman.onboarding.checkPodmanInstalled"
        ]
    },
    ...
    ],
    ...
}
When the checkPodmanInstalled step becomes active, the command podman.onboarding.checkPodmanInstalled is invoked. Upon completion of its execution, the step is considered complete, and the user is then moved to the next one.
Here's another example, this time using a context value:
"commands": [
    {
    "command": "podman.onboarding.checkPodmanInstalled",
    "title": "Podman: Check podman installation"
    },
],
"onboarding": {
    "title": "Podman Setup",
    "steps": [
    {
        "id": "checkPodmanInstalled",
        "title": "Checking for Podman installation",
        "command": "podman.onboarding.checkPodmanInstalled",
        "completionEvents": [
            "onboardingContext:podmanVersion == 4.7.2"
        ]
    },
    ...
    ],
    ...
}
When the checkPodmanInstalled step becomes active, the command podman.onboarding.checkPodmanInstalled is invoked. As soon as the context value podmanVersion equals 4.7.2, the step is marked as completed, and the user is moved to the next one.
You might wonder: who or what sets the context value? If you use a custom context value, it should be your extension's job to set it. Following the example above, we could set the context value during the execution of podman.onboarding.checkPodmanInstalled such as
extensionApi.commands.registerCommand(
    'podman.onboarding.checkPodmanInstalled',
    async () => {
      // do something
      ...
      // set podmanVersion context value so we can mark the step as complete
      extensionApi.context.setValue('podmanVersion', '4.7.2', 'onboarding');
    }
)
After updating the context, the UI is refreshed, and Podman Desktop moves the user to the new step.
Content
The content property is an array of arrays where each item in the parent array defines a row, and each item in the child arrays defines a cell.
content = [
  ['cell', 'cell'], //row
  ['cell', 'cell', 'cell'], //row
];
The JSON schema for a content cell entry is
"type": "object",
"properties": {
    "value": {
        "type": "string"
    },
    "highlight": {
        "type": "boolean"
    },
    "when": {
        "type": "string"
    }
},
"required": ["value"]
Value is the only mandatory field and it can be a simple string or a Markdown string to render advanced objects.
In addition to all the standard Markdown syntax, Podman Desktop provides 3 custom Markdown components: button, link, and warnings list.
1 - You can create a button that executes a command (syntax - :button[Name of the button]{command=command.example title="tooltip text"}) or behaves like a link (syntax - :button[Name of the button]{href=http://my-link title="tooltip text"}).
E.g.:
"value": ":button[Check requirements again]{command=podman.onboarding.checkPodmanRequirements}"
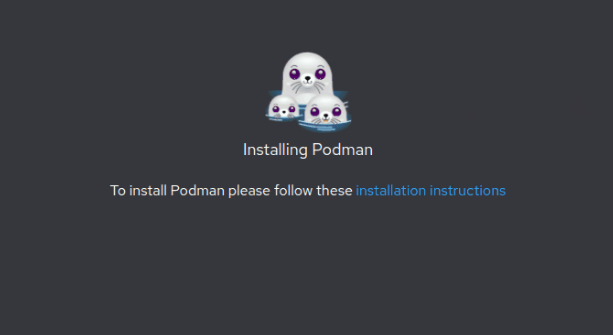
2 - Similarly, you can create a link that executes a command (syntax :link[Name of the command link]{command=command.example title="tooltip text"}) or behaves like a normal link (syntax - :link[Name of the command link]{href=http://my-link title="tooltip text"})
E.g.:
"value": "To install Podman please follow these :link[installation instructions]{href=https://podman.io/docs/installation#installing-on-linux}"
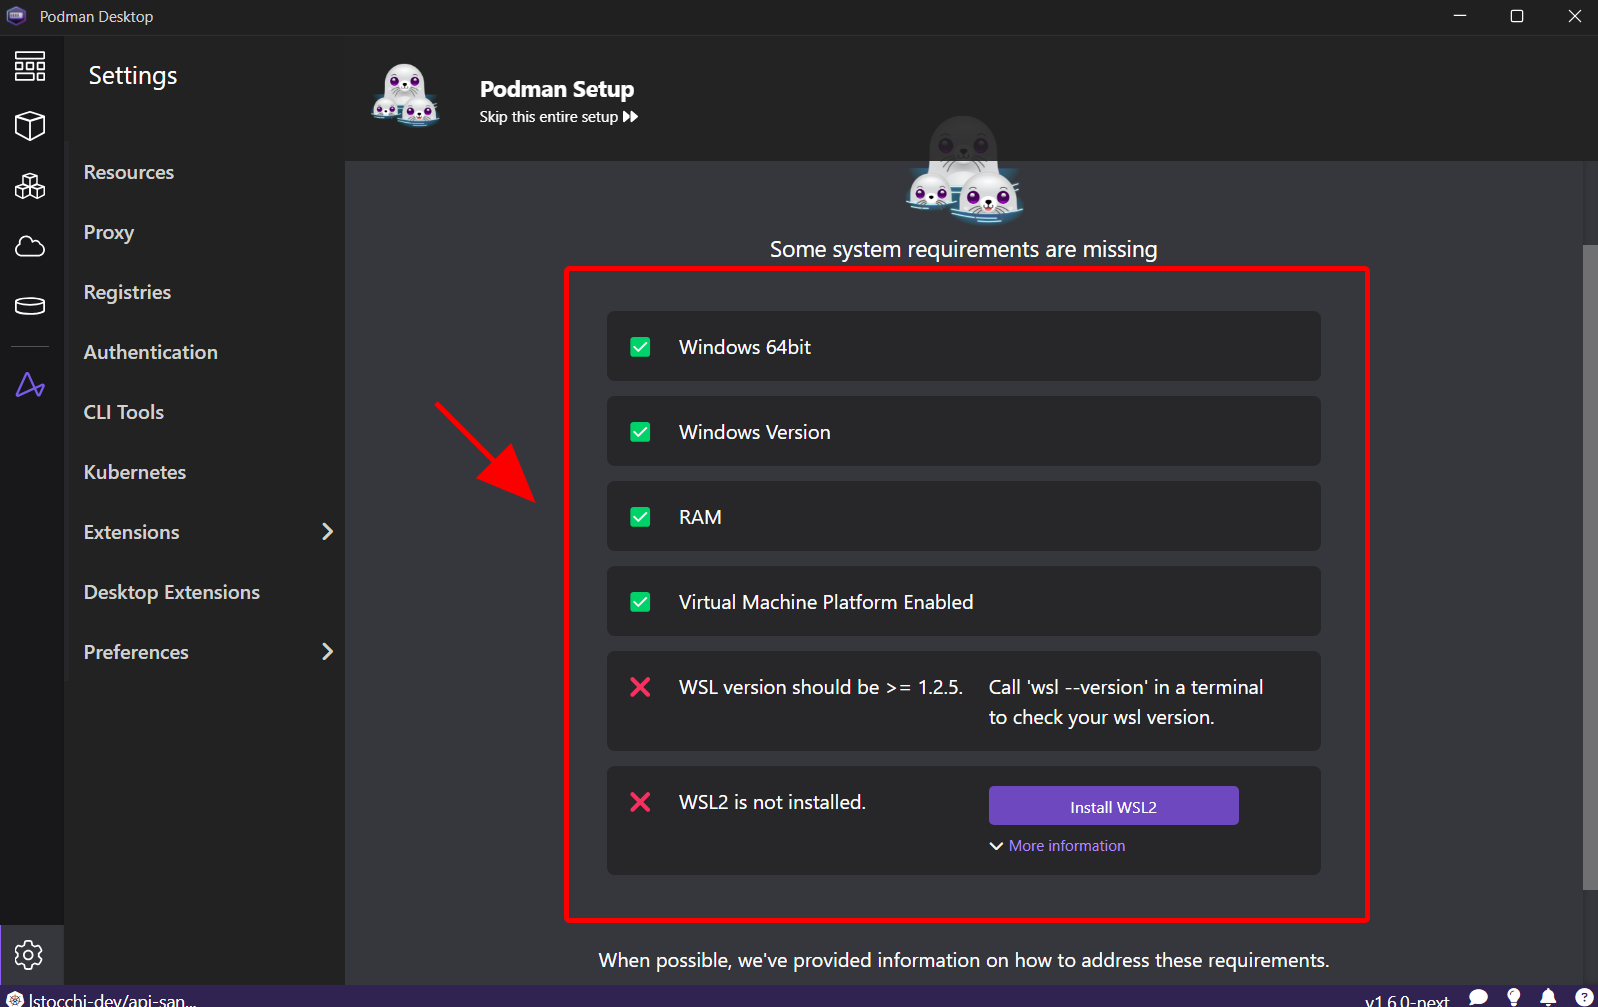
3 - The warning component allows displaying a list of items (syntax - :warnings[[item]]), where an item consists of:
"type": "object",
"properties": {
    "state": {
        "type": "string"
    },
    "description": {
        "type": "string"
    },
    "command": {
        "type": "object",
        "properties": {
            "id": {
            "type": "string"
            },
            "title": {
            "type": "string"
            }
        },
        "required": [
            "id",
            "title"
        ]
    },
    "docDescription": {
        "type": "string"
    },
    "docLinks": {
        "type": "array",
        "items": {
            "type": "object",
            "properties": {
            "title": {
                "type": "string"
            },
            "url": {
                "type": "string"
            },
            "group": {
                "type": "string"
            }
            },
            "required": [
            "title",
            "url",
            "group"
            ]
        }
    },
}
Adding a complete list in the package.json can be confusing, so a better approach is to use a context value
"value": ":warnings[${onboardingContext:warningsMarkdown}]"
at runtime, ${onboardingContext:warningsMarkdown} is replaced by the actual list filled in the backend
const warnings = [];
...
const warning = {
    state: res.successful ? 'successful' : 'failed',
    description: res.description,
    docDescription: res.docLinksDescription,
    docLinks: res.docLinks,
    command: res.fixCommand,
};
warnings.push(warning);

extensionApi.context.setValue('warningsMarkdown', warnings, 'onboarding');
The highlight and when properties are optional. They are used to change the background color or define when the content column should be visible.
Component
Podman Desktop has some built-in components that can fit perfectly into an onboarding workflow, such as the create new connection wizard.
If you are working on an extension that allows creating a Kubernetes cluster, it would not make sense to re-create a page where the user can add the name, the resources to use, and so on. This is when the component field comes in handy.
By specifying the component you want to import, all the elements, styling, and actions are embedded into the step.
Currently, Podman Desktop only supports two types of components for onboarding: createContainerProviderConnection and createKubernetesProviderConnection.
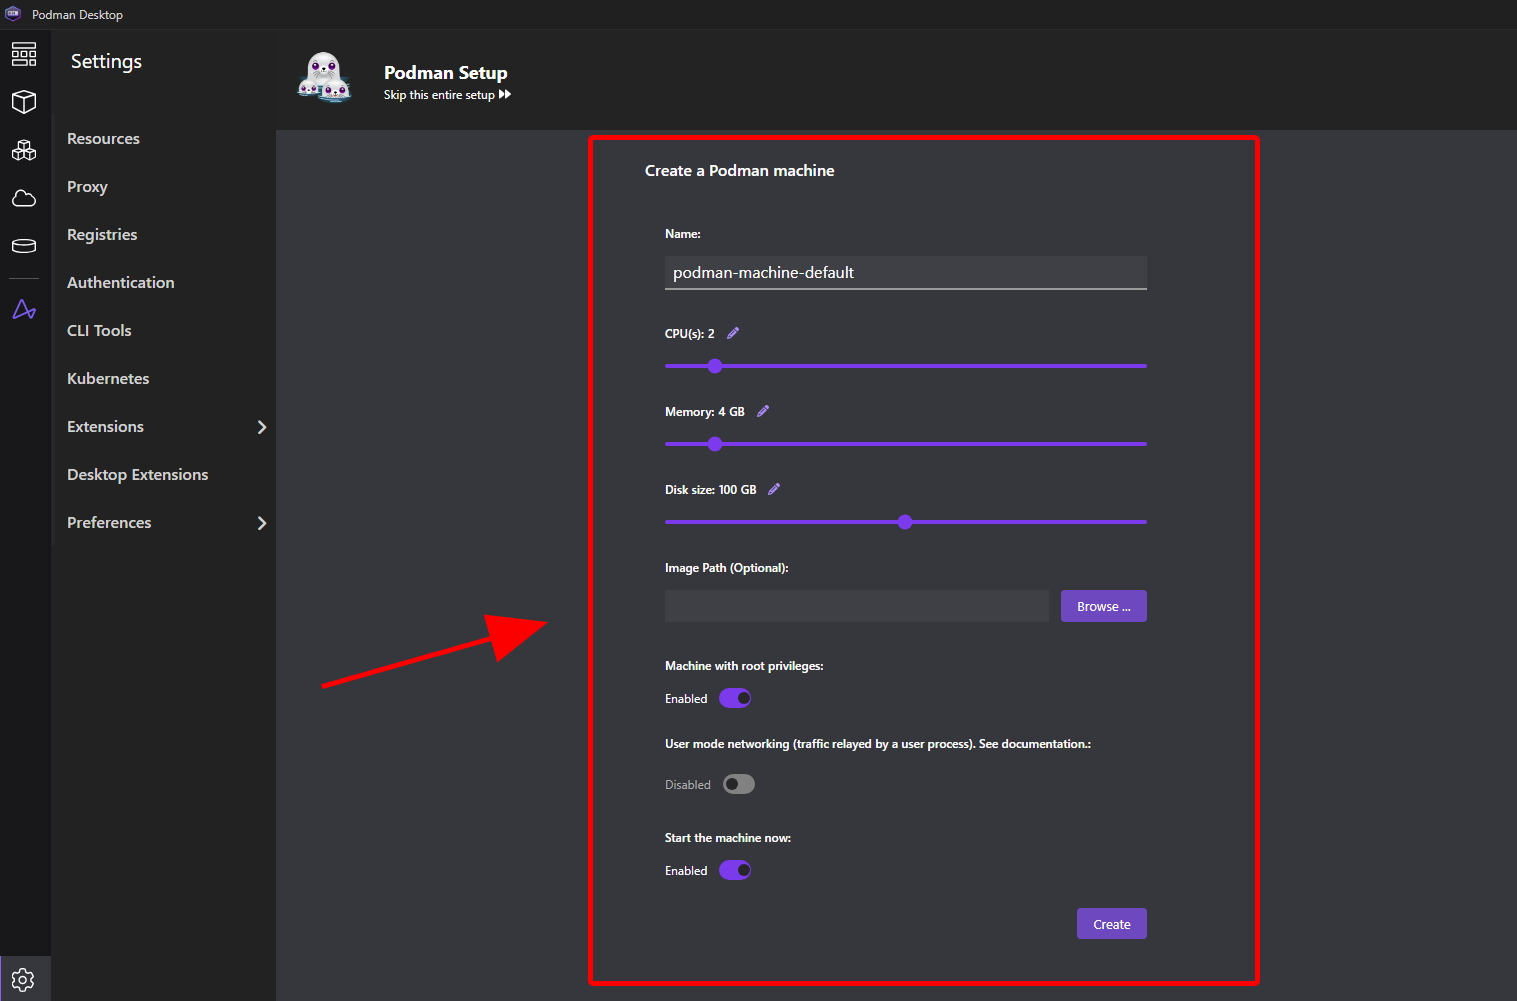
An example can be seen in the Podman extension, where you can create a Podman machine during the workflow.
{
    "id": "createPodmanMachine",
    "title": "Create a Podman machine",
    "when": "!onboardingContext:podmanMachineExists && !isLinux",
    "completionEvents": [
        "onboardingContext:podmanMachineExists"
    ],
    "component": "createContainerProviderConnection"
},
Note: when using the component field, you should omit the content
When
The when property defines when a step must be visible. You can use any when clause, and Podman Desktop will evaluate it any time the context changes.
State
The state, when set, allows Podman Desktop to distinguish a normal step from a special one. It is used to associate a step with a failed state (failed) or, alternatively, with a complete state (completed).
Note: the last workflow step should have completed state.
Based on the state, Podman Desktop might show some default objects.
When a step with a failed state is encountered, Podman Desktop displays a Retry button, allowing the user to restart the workflow.
{
    "id": "podmanFailedInstallation",
    "title": "Failed installing Podman",
    "when": "onboardingContext:podmanFailedInstallation",
    "state": "failed"
},
{
    "id": "podmanSuccessfullySetup",
    "title": "Podman successfully setup",
    "when": "onboardingContext:podmanIsInstalled",
    "state": "completed"
}