MacOS
Podman Desktop requires the Podman engine. If you do not have the Podman engine installed, Podman Desktop will prompt you to do so when you open it.
You can install Podman Desktop on macOS by using:
-
The .dmg installer file: This is the recommended way to install Podman Desktop, Podman, and Podman CLI smoothly. The
.dmginstaller provides the most stable experience by bundling the required components. This avoids the path conflicts and stability issues common with package managers like Homebrew. -
Homebrew: This is an alternative way, but it is not recommended, as there is no guarantee of the stability of Brew installs of Podman and Podman Desktop.
noteIf you have already installed Podman using Homebrew, perform one of the following steps to avoid any unexpected results when using Podman Desktop:
- Uninstall Podman through Homebrew before using the recommended .dmg installer.
- Do not use the .dmg installer to install Podman Desktop. Instead, use Homebrew only.
Installing Podman Desktop using the .dmg file: Recommended
The Get started with Podman Desktop screen helps you start the onboarding process. Alternatively, you can completely skip this onboarding setup. You can always complete the setup later by using one of the following ways:
- Use the Set up button in the notification on the Dashboard page.
- Use the Setup Podman button on the Podman tile, located on the Settings > Resources page.
Procedure
-
Download the
.dmgfile from the Downloads section of the website.noteWhile we recommend getting the "universal" binary file, which will work irrespective of the chip architecture your Mac possesses, you also have the option to download the applicable .dmg file depending on your Mac hardware architecture (that is, Intel or Apple M1).
-
Locate the downloaded file, and double-click it. Usually, you will find the downloaded file in the
Downloadsfolder. -
Drag the Podman Desktop application and drop it to the
Applicationsfolder.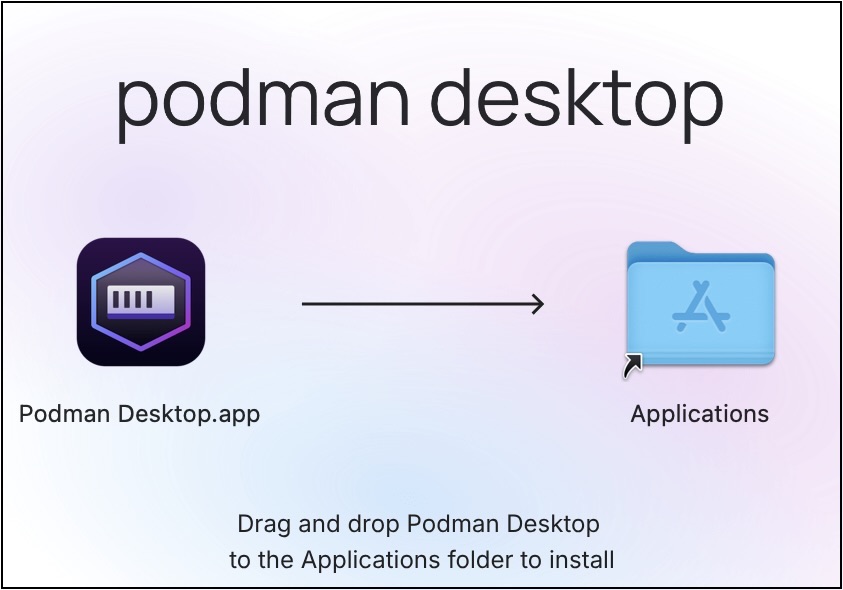
-
Start Podman Desktop from the
Launchpador Mac'sApplicationsdirectory. The Get started with Podman Desktop screen opens. -
Click Start Onboarding.
-
Perform the following steps to install Podman:
-
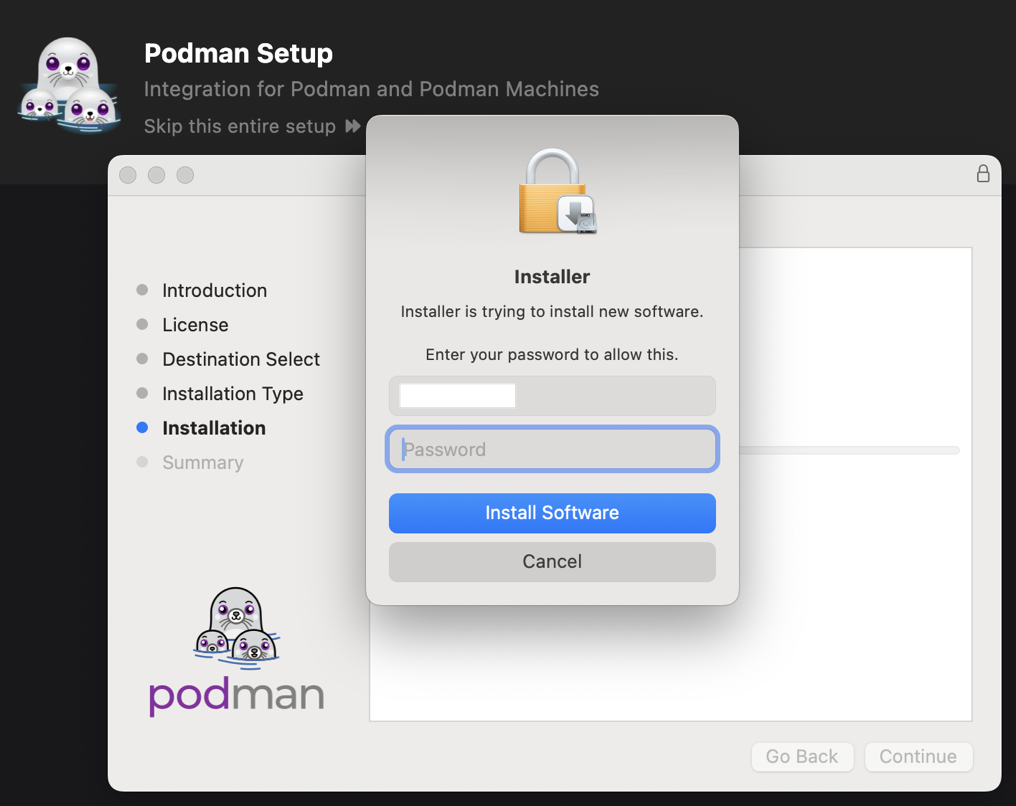
Click Next. A confirmation notification opens.
-
Click Yes. The Podman Setup screen opens.
-
Follow the instructions on the screen, enter your system password when prompted, and click Install Software.
-
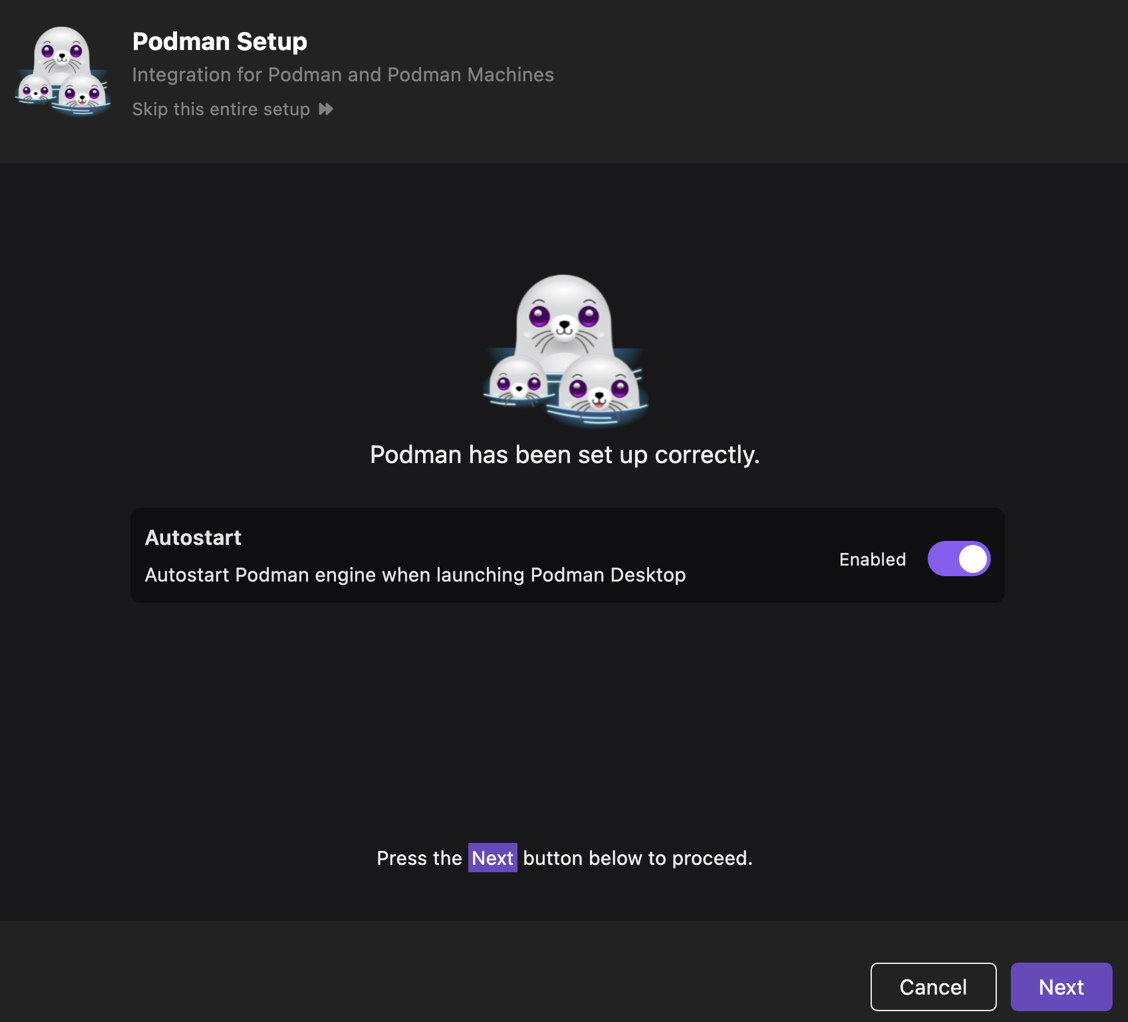
Click Close. A page notifying that Podman is set up correctly opens.
-
-
Perform the following steps to create a Podman machine:
-
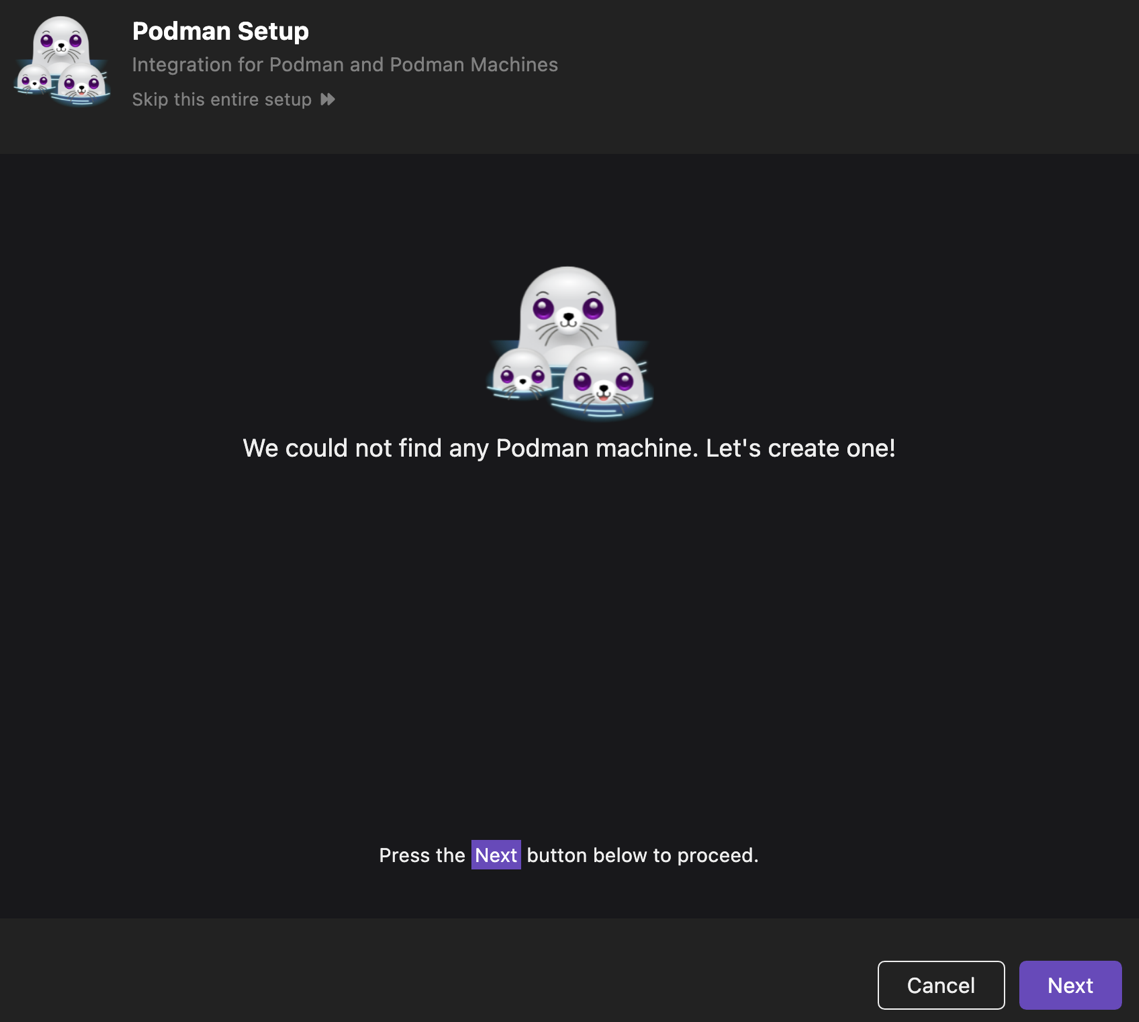
Click Next. A page notifying you to create a Podman machine opens.
-
Click Next, and then click Create.
 note
noteYou can also create additional Podman machines of any provider type later. For more details, refer to Creating a Podman machine.
-
-
Click Next, and follow the instructions on the screen to install the
kubectlandcomposeCLIs. -
After installing the CLIs, click Next to go to the Dashboard page.
Verification
- Go to the Settings > Resources page to check the Podman machine is running.
You are ready to use the application.
Installing Podman Desktop using Homebrew: Not recommended
Installation steps
-
Open a terminal on your Mac.
-
Run the following command:
brew install --cask podman-desktopHomebrew will also install the Podman engine along with the Podman Desktop application in case you do not have it installed.
After the command is executed, you can find the Podman Desktop application in the
Applicationsdirectory of macOS.
Getting Started
Learn more on how to get started with Podman Desktop by clicking here.